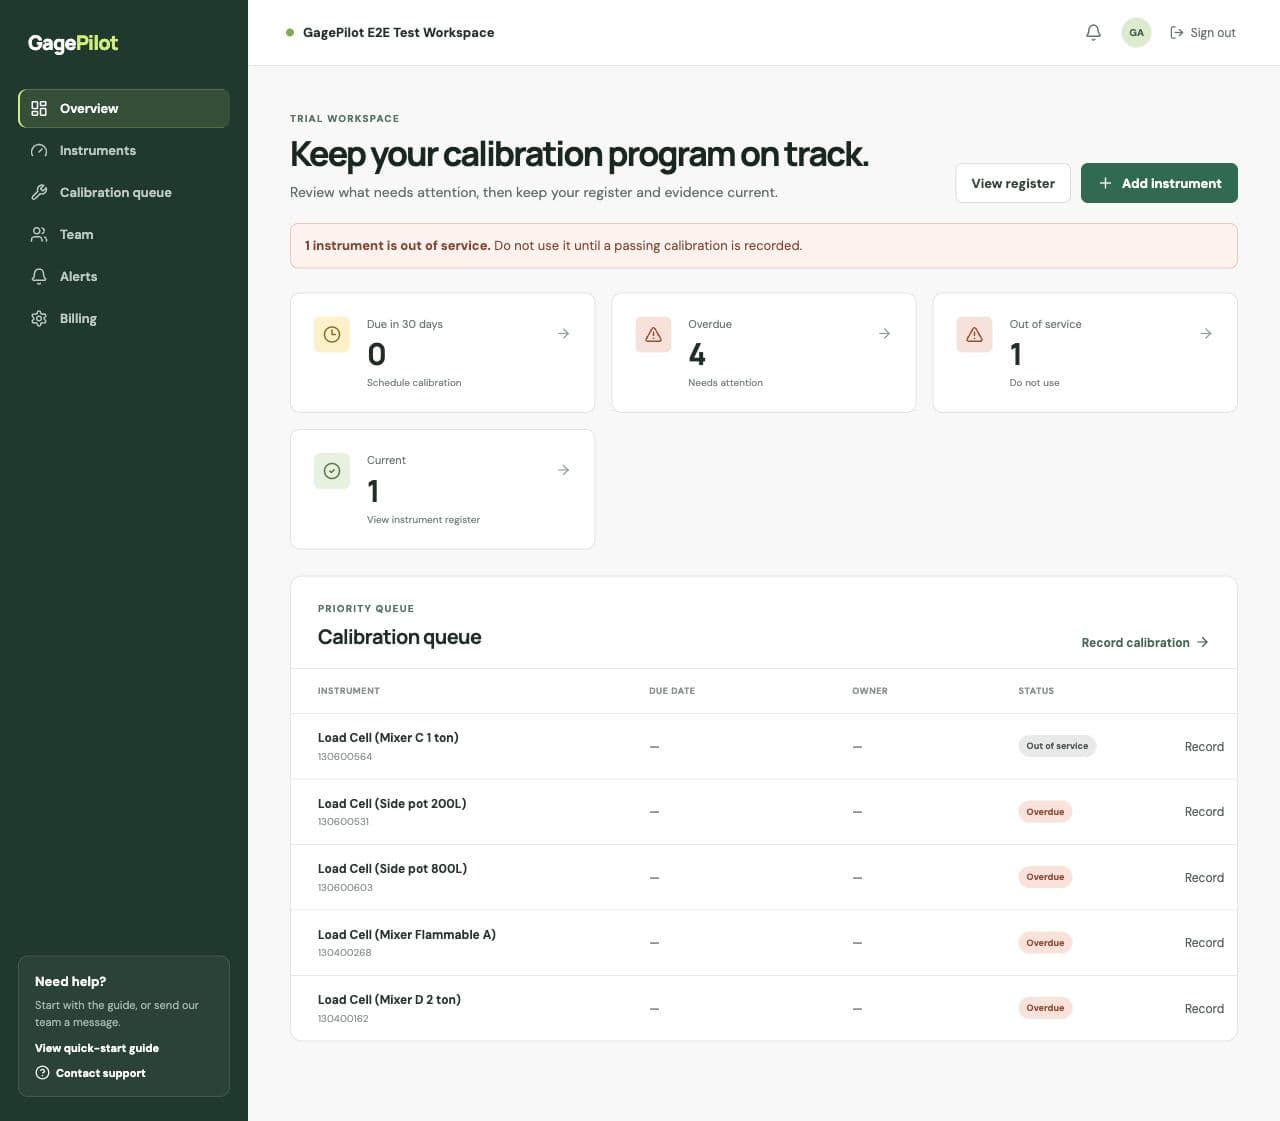
The four-step setup
- Import your registerOpen Instruments and upload a CSV or XLSX file. At minimum, include a unique asset ID, instrument description, and next due date.
- Review the calibration queueThe Overview page groups work into due soon, overdue, out of service, and current so the team can focus on exceptions first.
- Record completed calibrationOpen Calibration queue, select the instrument, record the result and next due date, then attach the certificate if one was supplied.
- Invite the right peopleUse Team to give owners, admins, and operators the access they need. Alerts can include workspace members and instrument assignees.
What to prepare before you start
- Your current CSV or XLSX instrument register
- A consistent asset or gage ID for each controlled instrument
- The next due date or interval for each instrument
- The people who should receive reminders and help maintain records
What GagePilot does not replace
GagePilot helps maintain schedules, records, histories, and evidence. It does not perform calibration, certify a quality system, or decide what your organization’s procedure should require.